GitHub Pages实在太慢了,科学上网有时候也卡住。
搭建Git服务器
首先使用 Xshell连接服务器,并切换 root用户,回退到根路径
-
安装
openssh1sudo apt-get install openssh-server # Ubuntu 2sudo yum install openssh-server # Centos -
安装完成之后,查看
ssh服务是否启动1ps -e|grep ssh
-
创建一个名为
git的用户,用于管理Hexo项目1adduser git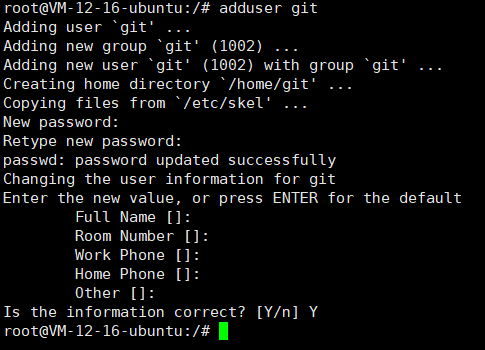
-
给
git用户添加文件的写权限1chmod 740 /etc/sudoers 2vim /etc/sudoers找到
User privilege specification部分,添加如下内容:1git ALL=(ALL:ALL) ALL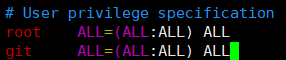
-
按
ESC退出编辑模式,输入:wq保存退出 -
将写权限收回
1chmod 400 /etc/sudoers -
切换至
git用户,创建~/.ssh文件夹和~/.ssh/authorized_keys文件,并赋予相应的权限1su git 2mkdir ~/.ssh 3vim ~/.ssh/authorized_keys按
i进入编辑模式,将我们先前生成的id_rsa.pub文件中的公钥复制到authorized_keys中,按ESC退出编辑模式,输入:wq保存退出。 -
赋予权限
1chmod 600 /home/git/.ssh/authorized_keys 2chmod 700 /home/git/.ssh -
在电脑本地桌面,右键
Git Bash Here,输入一下命令,其中SERVER填写自己的云主机ip,如果能够免密登录即代表成功。1ssh -v git@SERVER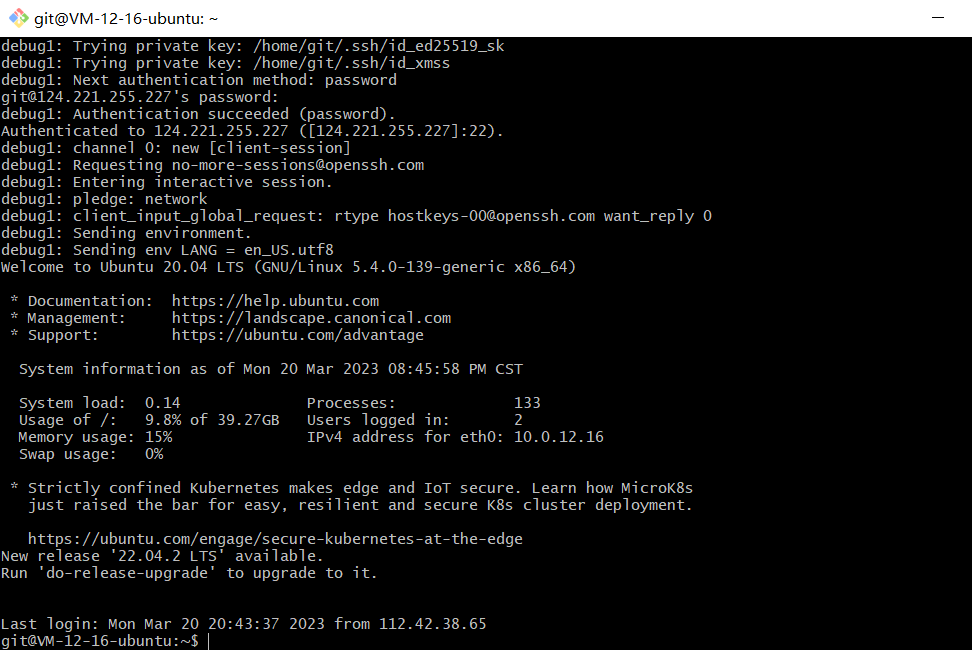
-
安装
git,有的话就不需要再安装1# 安装 Git 2sudo yum -y install git 3# 查看版本 4git version -
在
var目录下创建repo作为Git仓库目录,并赋予权限,先切换到root账户,然后输入:1mkdir /var/repo 2chown -R git:git /var/repo 3chmod -R 755 /var/repo创建
hexo目录作为网站根目录,并赋予权限1mkdir /var/hexo 2chown -R git:git /var/hexo 3chmod -R 755 /var/hexo创建一个空白的
git仓库1cd /var/repo 2git init --bare hexo.git在
/var/repo/hexo.git下,有一个自动生成的 hooks 文件夹,我们需要在里面新建一个新的钩子文件post-receive,用于自动部署1vim /var/repo/hexo.git/hooks/post-receive进入编辑模式,输入以下内容:
1#!/bin/bash
2git --work-tree=/var/hexo --git-dir=/var/repo/hexo.git checkout -f
写入后添加可执行权限
1chown -R git:git /var/repo/hexo.git/hooks/post-receive
2chmod +x /var/repo/hexo.git/hooks/post-receive
配置Nginx托管文件目录
-
安装Nginx
1sudo yum install nginx -y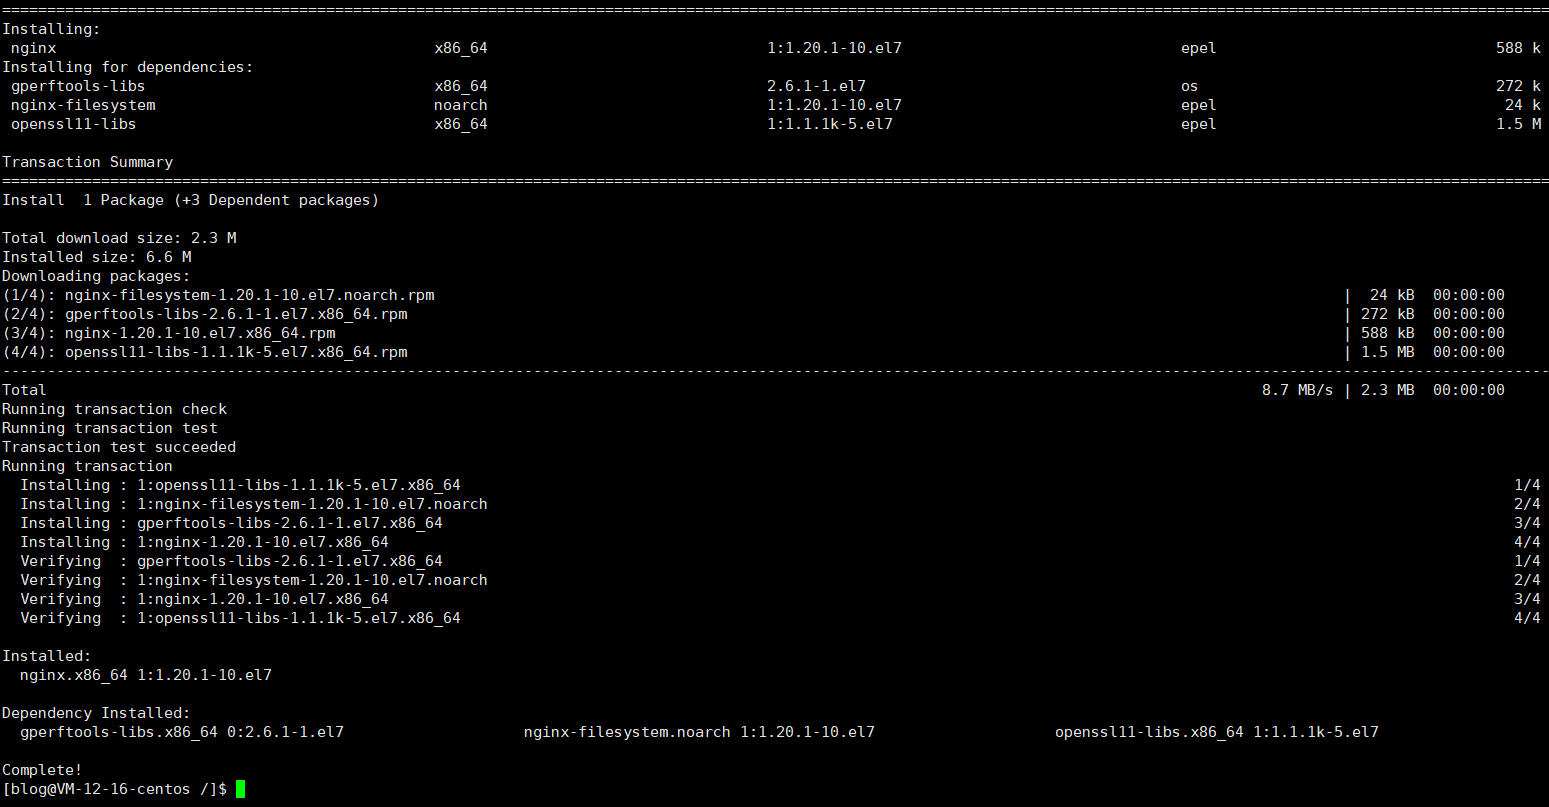
安装成功后,在浏览器中输入服务器的ip地址,即可访问到Nginx的默认站点

-
配置
Nginx1nginx -t编辑
nginx.conf文件1vim /etc/nginx/nginx.conf按
i进入编辑模式,粘贴完按Esc键退出编辑模式,输入:wq保存退出。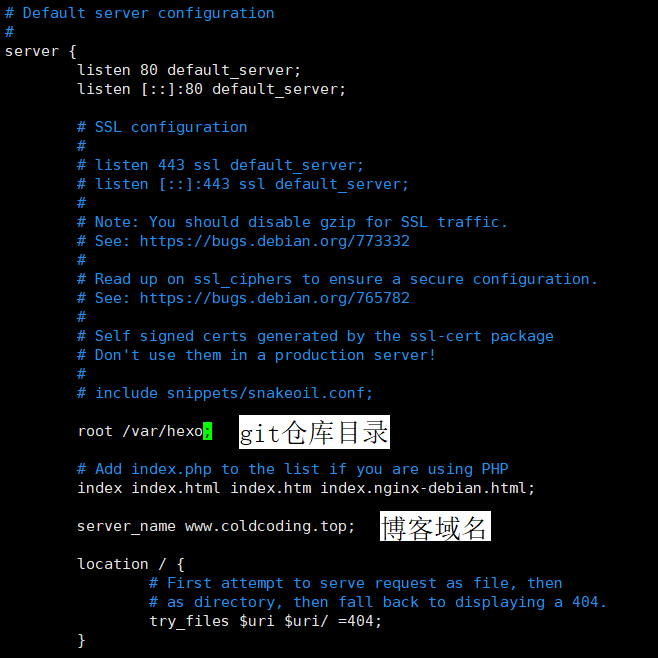
-
启动
nginx1systemctl start nginx.service重启
ngxin1systemctl restart nginx.service
修改 Hexo配置
在配置文件 _config.yml中找到 deploy,修改为
1deploy:
2  type: git
3  repo: git@hjxlog.com:/var/repo/hexo.git #repo改为repo: git@你的域名:/var/repo/hexo.git
4  branch: master
三连部署
1hexo cl & hexo g & hexo d